These are simple and only take about one hour to make, probably less if you are really good at crocheting! And of course depending on how big you want the flower, you can easily add more rounds of petals to this by following the instructions on the bottom
I have done my best to write clear instructions please let me know if you have issues and I will do my best to answer them. I'd love to see pictures if anybody makes one!
Ok here we go
Step One
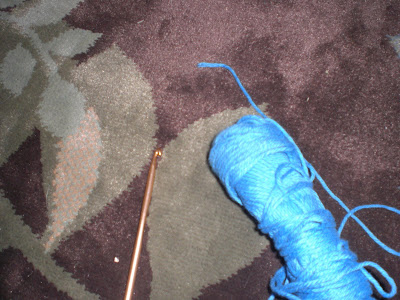
Get your yarn and your hook, I used a size H-8 for this one, but it doesn't really matter what size you use. Also you will need yarn.
Step 2:

Chain six
Step 3:

Skip the first single crochet, single crochet into the back loops of all the single crochets on the row, this creates the ribbed effect
Step 4:

Chain one and turn, continue as with row one, single crocheting into the back loops to continue with the ribbed effect
Keep single crocheting in those back loops! You can see the ribbing start to take effect
Step 6:

Keep Going
Step 7:
When it is a little smaller then the size you want it then you are done, remember that this ribbed effect makes so that the headband will stretch that way it stays on the head well
Step 8:
Now you are going to slip stitch the two ends together to make it a band, Crochet the ends of the yarn back into the band where you slip stiched so that it looks neat, you can also save these ends and if you don't have a needle and thread handy, use them to tie the flower on
The Flower
Step 1:

You are going to make a magic ring (find out how to make one here) Single Crochet five in the ring, slip stitch to the top of the first (you will have six single crochet)
Step 2:
Chain one, two single crochets in each single crochet from row one (you will now have 12)
Step 3:
Cut the yarn from color one, and add on color two by slip stitching it into the first chain of the ring
Step 4:
Now you are going to chain one, in the next single crochet, half double crochet, double crochet, half double crochet, slip stitch into the next single crochet, do this all the way around and connect it to the first petal. You will have six petals
Step 5:
Now heres where it can get a little tricky, turn your flower over on the back and insert your hook into the back of one of the posts of the single crochets that you slip stitched into. You will bring up the thread and chain four, single crochet into the back of the next slip stitched single crochet. then chain 3, do this all the way around you will have six. Connect with a slip stitch to first slip stitch
Step 6:

In each of the chain 3 that you made you are going to chain two, make a half double crochet, three double crochet, and a half double crochet, then slip stitch into the next set of chains, slip stitch the last petal to the first and finish off your yarn,
You can easily add more layers by adding triple crochets or more double crochets and adding on more petals like you did this row
What A Lovely Flower! We are almost done!
Joining the flower to the headband
On this headband I used a needle and thread to connect the flower to the headband.
Step 1:
Step 2:
Sew the flower on, simple, you probably didn't need a picture, but I was in tutorial mode so.
What the back might look like.
The other way to do this would be to not weave the ends of your strings in, and use them to tie the flower on, I have done this before and it works well, especially if you leave the ends really long and crochet them around the whole middle of the flower. But I think the needle and thread looks best
She wasn't really in the modeling mood this morning but you get the idea.
Note: I'm sure that there are many patterns similar to this on the internet, because thats how I learned how to make a flower, however, this is a compilation of all those ideas mushed around in my head and then put together.
Now go make one and let me see it!
Headband
Ch 6
row 1: sk 1st ch, sc in back loop of nxt 5 st ch 1 turn
row 2-?? continue pattern to create ribbed effect till large enough
sl st first row to last row
Flower
Magic ring
rnd1: ch 1 5 sc in rnd sl st 1st ch1
rnd2: ch 1 2sc in each sc
rnd3: change color,
ch 1 *(hdc, dc, hdc) in nxt sc, sl st next sc* repeat from * to complete round st sl st to 1st ch1
rnd4: change color
sl st into back post of 1st (sl st in sc) ch 4 *sc in next back post, ch 3* repeat from * to complete round
rnd5: in next set of ch *(ch2, hdc, 3dc, hdc) sl st in next sc * repeat from * to complete round and finish


bravo! i think they look awesome!
ReplyDeletei wonder would it look silly if i wore one??
Great tutorial and cute baby.
ReplyDeleteThey are adorable and you daughter is so beautiful! She is very fortunate to have a Mom who is so crafty!
ReplyDelete